

")

Birtley CB150 Standard Duty Cavity Wall Lintel | 150mm Cavity
Price range: £38.52 through £243.92
In stock and ready for quick delivery to your site
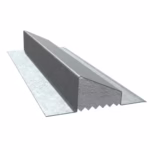
Birtley CB150 Standard Duty 150mm Cavity Wall Lintel
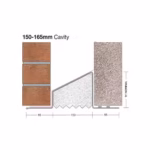
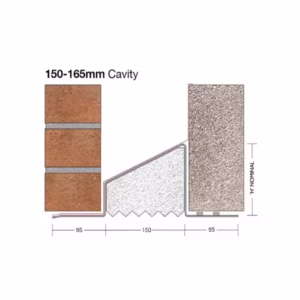
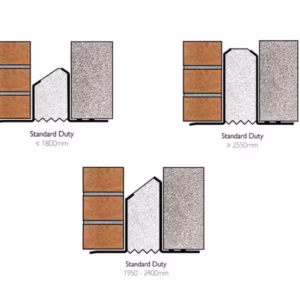
The Birtley CB150 is a standard duty cavity wall steel Lintel designed specifically for cavities between 150mm-165mm.
It is also based on a wall construction of 100mm outer leaf brickwork and 100mm inner leaf blockwork.
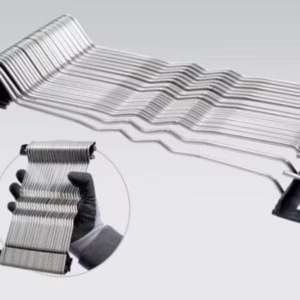
Manufactured from structural grade mild steel S275JR and coated with a hot-dip galvanisation process post-fabrication, the CB150 offers exceptional zinc protection that surpasses many other lintels in its class. This method ensures a coating thickness of approximately 65µm, significantly enhancing its corrosion resistance and longevity.
Includes expanded polystyrene insulation combined with specialised engineering works to maintain consistent indoor temperatures and minimises thermal bridging, thus enhancing buildings energy efficiency.
Featuring an internal plaster key, it ensures a smooth finish and integrates seamlessly with different architectural styles, simplifying the installation process.
CB150 Key Features:
- Standard Duty
- To suit 150mm-165mm cavities
- Super galvanised coating
- Available in lengths from 750mm to 3300mm
- 100mm inner leaf
- 100mm outer leaf
- Not suitable for concrete floor or point loads
Gilmore Building Supplies are Birtley Lintel stockists, offering nationwide delivery. With a wide range of Lintels in stock, we’re able to deliver quickly to help you avoid any delays on site.
While we stock a wide range of lintels, please contact us for current availability. Some items are made to order
CB150 Specification.
| Length(mm) | SWL (kN) | Weight (kg) | Height (mm) | Cavity (mm) | Inner Leaf (mm) | Outer Leaf (mm) |
| 750 | 20 | 7 | 112 | 150-165 | 95 | 95 |
| 900 | 20 | 8 | 112 | 150-165 | 95 | 95 |
| 1050 | 20 | 9 | 112 | 150-165 | 95 | 95 |
| 1200 | 20 | 10 | 112 | 150-165 | 95 | 95 |
| 1350 | 20 | 12 | 112 | 150-165 | 95 | 95 |
| 1500 | 20 | 13 | 112 | 150-165 | 95 | 95 |
| 1650 | 20 | 17 | 117 | 150-165 | 95 | 95 |
| 1800 | 20 | 19 | 117 | 150-165 | 95 | 95 |
| 1950 | 20 | 20 | 117 | 150-165 | 95 | 95 |
| 2100 | 20 | 22 | 124 | 150-165 | 95 | 95 |
| 2250 | 25 | 26 | 153 | 150-165 | 95 | 95 |
| 2400 | 25 | 27 | 153 | 150-165 | 95 | 95 |
| 2550 | 25 | 29 | 153 | 150-165 | 95 | 95 |
| 2700 | 25 | 31 | 153 | 150-165 | 95 | 95 |
| 3000 | 30 | 34 | 177 | 150-165 | 95 | 95 |
| 3300 | 30 | 48 | 177 | 150-165 | 95 | 95 |
You can also download a copy of the date sheet here.
How do I select the correct Lintel?
Steel Lintels are designed to support the loads above windows, doors and other building openings. It’s important to choose the correct Lintel type, length and Lintel duty to prevent structural failures.
Cavity wall Lintels are designed for masonry walls, where there is a space of air between the inner and outer leaf which usually compromises of brickwork to the outer leaf and blockwork to the inner leaf. This method has become the most common build method. To offer support to both the inner and outer leaf, a one-piece Lintel is designed to meet the needs of both.
The length of the Lintel is available in increments from 750mm to 3300mm.
When choosing the correct length, you will need to know the structural span plus a bearing of 150mm being allowed for at each end. For example, if your opening was 1800mm, you would require a 2100mm Lintel.
It is also important to measure the inner and outer leaf as the CB150 Lintel is designed for 100mm inner and 100mm outer.
For example, if your concrete blocks are 140mm wide, this means the CB150 Lintel would be unsuitable as you would require a wider inner leaf Lintel.
Next you need to know the safe working load of the Lintel supports you requirement, this is usually specified by your structural engineer, however if you need any advice by sending us your working drawings, we will be able to run some calculations to reassure you in your decision.
How to Install a Steel Lintel – Step-by-Step Guide
Installing a lintel correctly is essential to ensure the structural stability of your opening. We always recommend using a qualified professional with experience in Lintel installation.
Step 1: Choose the Correct Type of Lintel
Before starting, make sure you have selected the right lintel for your project. For example, a cavity wall lintel, solid wall lintel, or external wall lintel.
Each type is designed to support specific wall constructions and load conditions.
Step 2: Assess Your Project
Are you;
- Replacing an existing lintel, or
- Installing a lintel for a new extension or opening.
If you’re replacing an old lintel, inspect the surrounding brickwork and blockwork carefully. The supporting structure must be sound, as all cavity lintels are tested on full bricks and blocks, not cut pieces.
Step 3: Check the Lintel Condition
Before installation, ensure the lintel is undamaged and perfectly straight. Any bends, distortions, or damaged edges (especially to the lips) can cause issues when levelling your masonry.
Step 4: Prepare the Opening
For replacements, use acrow props to temporarily support the structure above.
Remove any obstructing masonry so you can safely access and fit the new lintel.
If your project involves heavy loads, you may need to fit concrete padstones for structural support.
Step 5: Install the Lintel
- Position the lintel level with the masonry opening, ensuring at least 150mm end bearing on each side.
- Lay the lintel on full bricks or blocks, not cut sections.
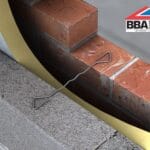
- In areas of severe weather exposure, fit a separate DPC (damp proof course) above the lintel.
- Install weep holes above the lintel at maximum 450mm centres, minimum of two per opening.
- Check alignment with a spirit level throughout installation.
- Build up brickwork and blockwork evenly on both sides to prevent uneven loading or rotation.
- Allow mortar to fully cure before applying any floor or roof loads.
Step 6: Finishing Touches
- Always install a cavity tray above the lintel to prevent moisture ingress.
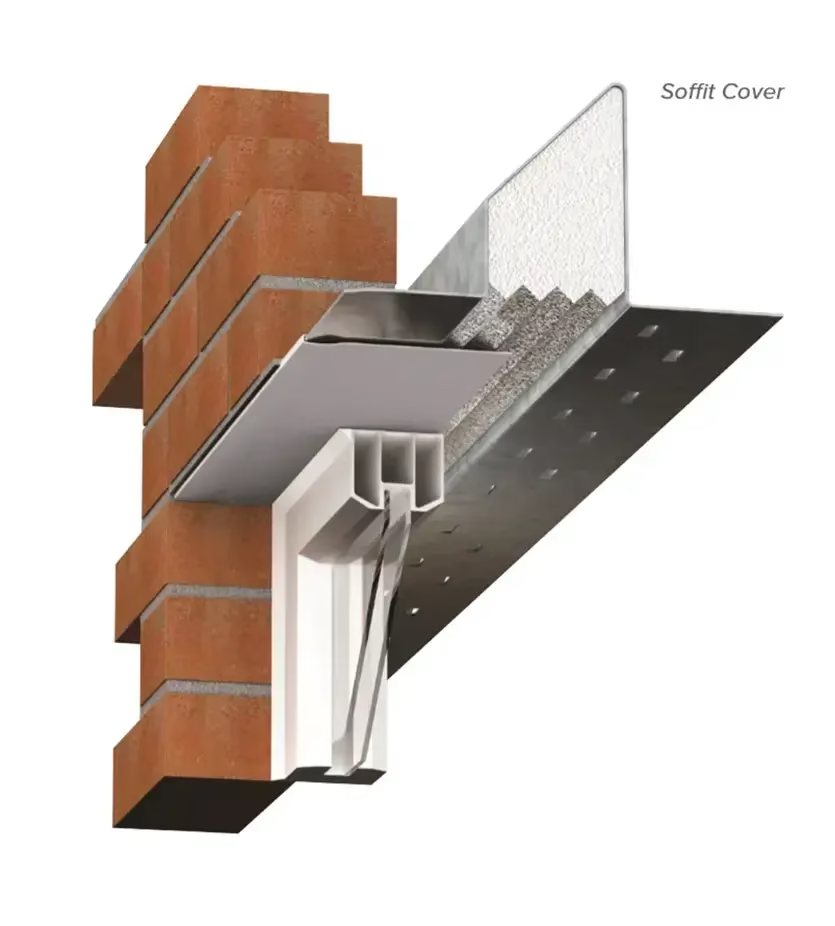
- If the underside of the lintel remains visible, you can fit a soffit cladding for a clean, professional finish.
| Weight | 4.35 kg |
|---|---|
| Lintel Type | Cavity Wall |
| Lintel Duty | Standard |
| Cavity Size | 150-165mm |
Only logged in customers who have purchased this product may leave a review.
What is a Birtley CB150 Steel Lintel used for?
The CB150 is a standard cavity wall lintel, designed to support brick or blockwork above openings such as windows and doors in a 150-165mm cavity wall construction.
What cavity size does the CB150 suit?
The CB150 is designed for a 150mm-165mm cavity, used in modern insulated cavity wall builds. Always check your wall construction to ensure the correct lintel type and size.
What load can the Birtley CB150 support?
Load capacities vary depending on span length and wall configuration. Refer to Birtley’s official load tables in the description or consult a structural engineer to confirm suitability for your project.
Is the CB150 lintel galvanised or protected against corrosion?
Yes, Birtley lintels are hot dip galvanised after fabrication, providing full protection against rust and corrosion for long lasting durability.
What if i need a heavy duty 150mm cavity Lintel?
Do not worry, we have you covered. Type 'HD150' into the search bar to find the heavy duty Steel Lintel to cover a 150mm cavity.
Birtley lintels supplied by Gilmore Building Supplies. Reliable support over openings in brickwork and blockwork.
Are you a tradesperson?
Register for a Trade Account today
and start saving with unbeatable wholesale pricing
Apply for a Trade AccountYou may also like…

Related products


Reviews
There are no reviews yet.